HOW TO MICROCHIP
Disclaimer: The following advice is meant to be used as a guide and we accept no liability for the following. If you are unsure please seek the assistance of a veterinarian or a friend who can preform the procedure safely.
Dogs & Cats
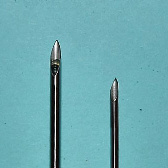
The sterile disposable needle contains a tiny rice-sized microchip which is sterile and biocompatible. The ultra fine needle will be inserted at the back of the neck between the shoulder blades and the discomfort level is no greater than clipping a toenail. The microchip when inserted will fuse with the connective tissue just under the skin.
Depending on the temperament of the animal, you may require someone to safely restrain the animal for the second or two it will take to insert the microchip. There should be no pain or discomfort to the animal.
Cut open the sterile pack containing the syringe and retain the barcodes. You will need them to complete registration and to optionally store your pets’ DNA.
Remove the guard from the needle, place the bevel surface up and perforate through the skin and eject the microchip. The microchip has now been permanently inserted.
If you wish to have permanent storage of your pets DNA, recap the needle. Its tip contains sufficient cellular material that if ever needed can provide a complete DNA profile of your pet.
Birds
Birds have the microchip inserted in their breast muscle and the bird must weigh at least 100g to be of sufficient size for this procedure. Small birds such as budgies, etc. are not ideal candidates for microchips. You will definitely need someone to carefully restrain the bird during the process.
Veterinarians frequently anaesthetize the bird for this procedure. There is minimal pain and discomfort to the bird but the Avian temperament must be dealt with.
Insert the needle bevel side up into the breast muscle at about a 45 degree angle to enter and eject the microchip.


